Guide confidence: Zone ratings and spot labels reflect community playtests on v1.8.1. Confidence tags (Verified, Community Favorite, Needs Retest) are editorial — retest after major patches.
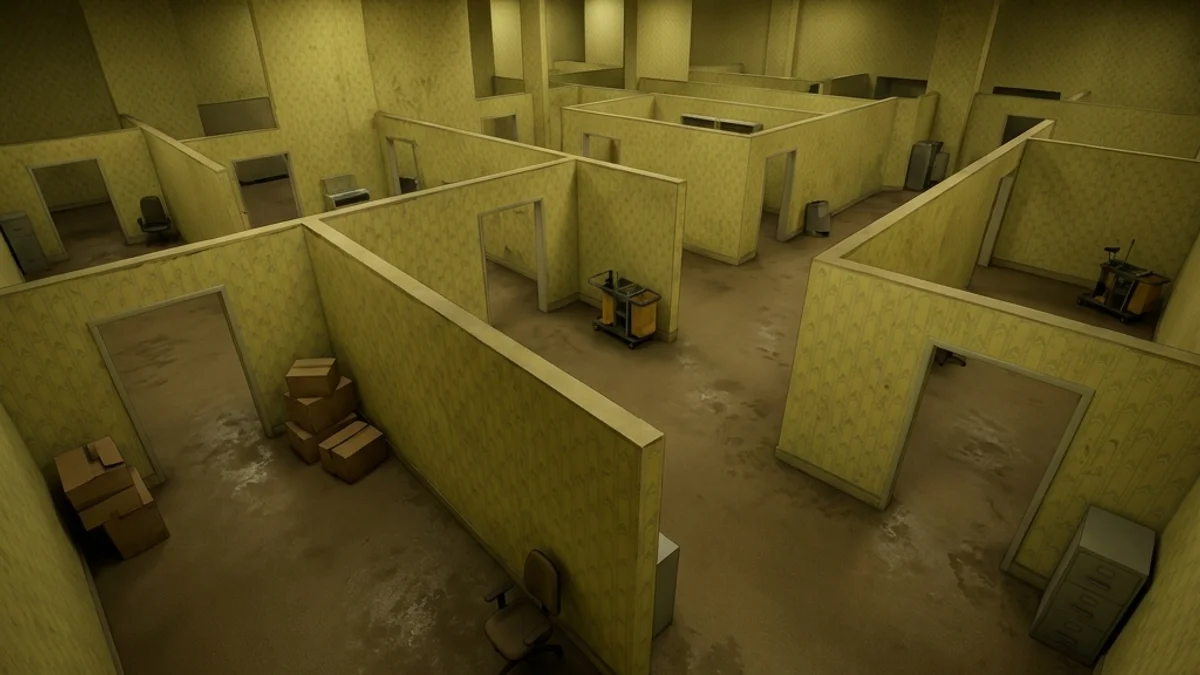
The official Backrooms stage is one of the most tense maps in Meccha Chameleon. Characterized by repeating yellow-toned wallpaper, damp carpet textures, and buzzing fluorescent lights, the map is designed as a modular maze. Because the corridors look identical, both seekers and hiders can easily lose their bearings, making spatial awareness and sound cues critical.
This guide provides a detailed map analysis, confirmed spots, paint difficulties, seeker search routes, and mod variant links.
1. Map Overview: Hider vs. Seeker Balance
Backrooms is heavily hider-favored due to its size and repeating layout:
- Hider Advantages: Maze structure prevents seekers from maintaining line of sight. Innumerable corner pillars and cubicles provide instant cover.
- Seeker Advantages: The constant buzz of fluorescent lights is low-frequency, making it easier to hear hider footsteps. Linear halls make it easy to block hider escapes.
2. Zone Breakdown & Tactical Ratings
Below is a breakdown of the modular sections in the Backrooms map:
| Zone Name | Hider Safety | Seeker Sweep Priority | Key Features |
|---|---|---|---|
| The Cubicle Maze | High | High | Modular half-walls, office desks, chairs. |
| Pillar Foyer | Medium | Medium | Large square columns, open floor, shadows. |
| The Red Light Zone | Medium | High | Red wall panels, dark corners, high contrast. |
| Ceiling Grid Walkways | High | Low | Ceiling beams, vents, electrical boxes. |
Competitive meta: Backrooms stalemates happen when seekers duplicate cubicle sweeps without a Foyer anchor — assign blocks early. Hiders who whistle-bait from Red Light without ceiling backup lose once seekers learn Phase 4; top-tier play keeps one hider on ceiling grid for late round insurance.
3. Confirmed Hiding Spots
Here are five verified spots for hiders in the Backrooms:
Spot 1: Corner Cubicle Joiners
- Location: The corner seam where two cubicle partitions meet.
- Stance: Select Corner-Squeeze.
- Confidence: Verified (Tightly pack your limbs; paint yourself the signature dirty yellow of the partitions).
Spot 2: Column Tops
- Location: Jump onto the top ledge of the large square columns in the Foyer.
- Stance: Select Curl.
- Confidence: Verified (Matches the dark concrete ceiling beams; seekers rarely look up).
Spot 3: Vent Shaft Intakes
- Location: Pressed against the wall-mounted ventilation grates.
- Stance: Select Wall-Flat.
- Confidence: Community Favorite (Match the metallic grey of the grates; roughness
0.5, metallic0.9).
Spot 4: Corridor Shadows
- Location: Any dark corner at the edge of the Red Light Zone.
- Stance: Select Crouch-Lean.
- Confidence: Needs Retest (Vulnerable to seeker flashlights; must keep paint roughness high to avoid specular glare).
Spot 5: Fluorescent Housing Seam
- Location: Pressed flat against the ceiling junction where fluorescent tube housings meet the tile grid, above the cubicle maze.
- Stance: Select Wall-Flat or Suitcase-Lay along the panel seam.
- Confidence: Community Favorite (Pairs with Phase 4 ceiling sweeps — seekers who skip upward scans miss this tier entirely).
4. Paint Difficulty: The Yellow Wallpaper
- Modular Wallpaper (Hard): The yellow wallpaper has a subtle repeating vertical texture. If you paint your character a flat yellow, you will look like a solid polygon against the textured wall. Try to align with the vertical seams or hide in the shadow junctions where the texture is masked.
- Carpet Grey (Medium): The carpet has a rough, noise-filled texture. Set your paint roughness to
0.9(fully matte) to prevent specular highlights when seekers shine flashlights at the floor.
5. Seeker Sweep Route (4 Phases)
To search the repeating rooms before the timer expires, seekers should follow this sweep pattern:
[Phase 1: Center Foyer] ──> [Phase 2: Cubicle Maze] ──> [Phase 3: Red Light Zone] ──> [Phase 4: Ceiling Grates]- Phase 1 (Center Foyer): Walk around the large square columns. Run against the base to check for collision.
- Phase 2 (Cubicle Maze): Sweep each office block. Walk in a zigzag pattern through the desks.
- Phase 3 (Red Light Zone): Turn on your flashlight (L) and sweep the dark corners. Look for shadow rotation anomalies.
- Phase 4 (Ceiling Grates): Aim your flashlight up. Scan the horizontal ceiling beams for curled shapes.
6. Patch Notes Impact
-
v1.2.0 Wall Collision Fix: Patched several modular cubicle seams that allowed players to clip out of bounds (see the v1.2.0 update notes).
-
v1.8.0 Audio Pass: Dampened the volume of the ambient fluorescent hum, making it easier for seekers to triangulate hider whistles (see the Whistle Guide).
-
v1.8.1 Stability: v1.8.1 did not alter Backrooms collision; audio pass from v1.8.0 still affects whistle triangulation — see Whistle Guide.
7. Recommended Lobby Settings
Backrooms supports 4–8 players and favors hiders when seekers get lost in the modular maze.
| Total players | Seekers | Whistle timer | Host notes |
|---|---|---|---|
| 4 | 1 | 50s | Longer timer compensates for seeker disorientation in repeating corridors. |
| 6 | 2 | 55s | Split seekers at Foyer — one cubicle block each — to avoid duplicate sweeps. |
| 8 | 2–3 | 60s | Enable whistle only after Phase 2; ceiling-tier hiders dominate late rounds. |
Difficulty tip: If hiders stall seekers with whistle baits, shorten prep phase by 5 seconds so seekers reach Red Light Zone before first whistle.
8. Tools & Prep for This Map
- Seeker Checklist — Foyer → Cubicles → Red Light → Ceiling order prevents infinite loops in identical corridors.
- Route Planner — select Backrooms as seeker with Medium risk for a zigzag cubicle path that covers 80% of hider tiers.
- Map Compare — contrast official Backrooms vs. Backrooms Variant before subscribing to community layouts.
- Hider Tips and Seeker Tips — yellow-wallpaper paint workflow and upward flashlight discipline matter here more than on Mansion.
First-match checklist (Backrooms)
- Prep (hider): Paint vertical wallpaper seams in-place — flat yellow reads as a solid polygon on textured panels.
- Prep (seeker): Mark Foyer column count mentally; identical corridors cause duplicate sweeps without a fixed origin.
- Mid-round: Red Light Zone needs flashlight on — hiders rely on ambient dark; seekers who forget L lose time here.
- Late-round: Phase 4 ceiling pass is mandatory; column-top and fluorescent housing spots decide tied lobbies.
Opening move (30 seconds): Hiders embed in nearest cubicle corner before Foyer traffic; seekers establish Foyer origin and assign cubicle blocks to avoid duplicate corridor loops.
Common mistakes: Hiders use flat yellow without vertical seam alignment; seekers treat Red Light as optional — flashlight-off corners still hold crouch-lean tiers that win stalemates. Always budget Phase 4 ceiling time even when cubicle tags look successful.
9. Related Workshop Content
If you want a different layout, subscribe to the Steam Workshop map Backrooms Variant, which features an expanded maze layout with custom portals. Read the Backrooms Variant Guide to learn how to subscribe.